Posts

Showing posts from 2015

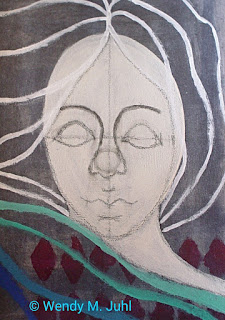
Inner Light: A Yule Visualization

Blessed Yule and Happy Holidays everyone!  I will be spending the holidays with my family for the first time since 2007, so I will only be posting a visualization this month.  I hope you all have a wonderful and love-filled holiday season. Yule is the winter solstice, and it celebrates the return of the sun.  The winter solstice is the longest night of the year.  After Yule, the days become gradually longer until the summer solstice, which is the longest day of the year.  For me, Yule is also my anniversary of going on this spiritual journey that I originally embarked upon 14 years ago.  Coincidentally or not, my last name, Juhl, is the Danish spelling of the word, Yule.  I was actually born with this name.  I don't have/use a magickal name. For me, Yule goes way beyond the return of the sun.  It's about committing to the path of Light again and allowing the Light to grow ever stronger, so it can change the world for the better.  I believe that as it is within us, so will i

Samhain Journaling: Part Three [Final]

Image
Welcome to part three of the tutorial!  Today, I'm going to show you ways to finish your journal page.  There are lots of techniques you can use in your journal, and I'll be sure to show you some others in the future.  Right now, we're going to focus on how I completed this art journal spread.  I really enjoyed bringing my ancestor to life in my journal.  I hope you do too.  It feels like a great tribute to one's heritage. »Waning Crescent Moon, The Steps: ***Materials and Substitutions:  You'll need a paintbrush, palette knife or old credit card in addition to a black Stabilo Marks All pencil, a Faber-Castell Pitt marker in warm grey 4, a white Prismacolor Premier colored pencil, and matte gel medium mixed with Liquid Pearls in silver pearl.  If you don't have a black Stabilo pencil, then use a black marker instead of the grey Pitt marker. Faber-Castell Pitt marker substitutes: any black or grey permanent marker, black paint, black colored pencil

Samhain Journaling: Part Two

Image
This art journal spread is taking longer than I expected.  Today, I'll show you how to paint the skin and eyes of the focal image.  In part three, I'll show you a fun way to add texture to the hair, how to add glazes to the background, and how to add interesting finishing touches to your spread. Drawing the Facial Features: I used a black Stabilo Marks All pencil to draw the face and redefine the hairline in some areas.  I wanted to make sure that the drawing would show up in the picture.  Normally, I would have used my delft blue Cretacolor Aqua Monolith watercolor pencil, since it blends in well with the colors I use for shading.  I would suggest using a watercolor pencil if you have it, but use whatever you have.  When I draw, I don't use a lot of guidelines.  I divide the face in half vertically and horizontally.  Other than that, I draw the features where they look good to me.  You can use my drawing as a guide to draw your own focal image if you're new to

Samhain Journaling: Part One

Image
According to archaeoastronomy, today is the actual crossquarter day for Samhain.  I originally didn't plan to do a journaling project for Samhain this year, since I already posted the tutorials about customizing a journal.  I was so inspired by the experience I had when I did the  Gathering of Ancestors visualization  that I had to art journal about it.  Since I art journal, the tutorial below will be about what I did to create the background and start the focal on my art journal page in my Moleskine sketchbook.  I will include suggestions for other types of journaling towards the bottom of this post.  As always, these are meant to inspire your creativity.  You don't have to do exactly what I did.  You can do your own thing. Background steps: 1. Using a watercolor pencil, Stabilo Marks All, or other water soluble media that is lighter than the colors you want to use for the base layer of your background, write out the message you received from your ancestor during the 

Gathering of Ancestors: A Visualization

Something that really resonates for me this time of year is honoring the ancestors, whether they're related by blood or they're your spiritual ancestors.  I created this visualization as a way to access your ancestral wisdom. Preparation: I would suggest that you record yourself reading this visualization and if you're really good with technology, you can superimpose the recording of this visualization over some shamanic drumming.  I usually just close my eyes and allow the words to paint a picture in my mind.  Although, I've had a lot of practice putting myself in trance states, so it's fairly easy for me.  Do whatever you feel most comfortable with.  Prior to starting the visualization, sit or lay down and take slow deep breaths until you're relaxed, grounded and centered. The visualization: You're standing in the center of a crossroads, four paths lay at your feet, but they are obscured by mist.  The mist parts in the East, revealing a road ascendin

Book Blessing Card

Image
In the last post, I showed an easy way to add pockets to any notebook or journal.  In this post, I'll discuss how to make a book blessing card to put in the front pocket of your journal. A book blessing is used to dedicate a journal for a particular purpose, usually spiritual or magickal in nature. Whether you're eclectic pagan like me or believe differently, you can write your own blessing that incorporates your spirituality.  A book blessing could be a prayer, a poem, a charm or spell, or some prose that describes your feelings regarding the purpose of this journal and how its contents are to be protected. This is the first time I've ever really felt the need to create a book blessing or dedication.  I personally think it's necessary, since any kind of transformative work involves some vulnerability.  I looked up book blessings online and while most of the websites that came up in the search were pagan or Wiccan, there were some common themes that could be interpr

Adding Pockets to Your Journal, Notebook or Sketchbook

Image
When I started customizing my Moleskine for this class, I ran into a slight problem.  There's only one pocket in the back of the book, and I need 3 pockets.  I wanted to include one pocket to hold the book blessing card (more on that in the next post), one pocket for the celebration card we'll create around this time next year, and the built-in pocket that is already in the journal for mementos.  There was one other issue, the first two and last two pages of the Moleskine wouldn't open fully.  That's when I devised a plot to make this little challenge work in my favor.  This is how the extra pockets turned out: Front Pocket/Inside Cover Back Pocket/Inside Cover It's really easy to make these pockets.  They aren't really made to hold much, but they will work perfectly to hold the blessing and celebration cards we're going to make.  I really enjoy layering washi tape, so this was a fun project for me. What You'll Need: 1. Matte gel me

A Brand New Book of Shadows/Journal/Notebook For the Next Year

Image
Welcome to our first project, creating the journal for the next year and a simple but pretty beaded bookmark for it.  I thought I'd start with a fairly easy project that invites you to play with whatever supplies you have.  I'll suggest substitutions for the supplies I used whenever I think of them. We're going to decorate a store bought art journal of whatever type you'd like to use and customize it so it works for this class.  I would suggest a hardcover journal, but use whatever you like.  For my journal, I'm using a small Moleskine sketchbook, but you can use a watercolor journal, art journal, visual journal, sketchbook, writing journal, composition book, etc.  Next year, I'll show you how to create a handmade, hand bound journal. Before I describe how I decorated the cover, I want to discuss the nature of smooth and slippery hardcover journals and notebooks and how difficult they make it for your paint to stick.  I learned a little trick awhile back.